More Pick-Your-Own Bounty
 Here is another dish from from the fruit that I picked from Larriland Farms. This is a raspberry tart akin to the strawberry tart that I wrote about earlier. Same recipe, I just put raspberries on top instead of strawberries. It was wonderful!
Tart Cherry Pie
I never used to like cherry pie when I was younger. The stuff that I had tried at restaurants or from the grocery store were too sweet and not very flavorful. Needless to say, I was an apple pie girl.
But that was before one of my roommates introduced me to tart cherry pies. I can't say that cherry pie is my favorite. Actually, I am an admittedly fanatical fan of rhubarb pie. The more I taste homemade cherry pie, though, the more I like it.
The recipe is relatively simple, one that is inspired by The King Arthur's Flour Baker's Companion.
For the crust, I use my handy pie crust recipe from Mark Bittman:
2 1/4 cups all purpose flour
1 tsp salt
2 tsp sugar
16 tbs butter (2 sticks), cold and cut into small cubes
6 tbs ice water
I mix the dry ingredients together. Then I cut the butter into the flour mixture with a pastry cutter. Then I mix in the ice water until it clings together. Next, I turn the mixture out onto the counter and knead it with the heel of my hand for less than a minute to more thoroughly incorporate the butter into the dry ingredients. I then divide the dough into 2 portions, form them into balls, wrap them in plastic wrap and place them in the freezer for 10 minutes.
After ten minutes, the dough is ready to be rolled out to fit the pie pan.
For the cherry pie filling:
5-6 cups sour cherries
3/4 cup sugar
3/4 tsp cinnamon
1/4 cup tapioca or corn starch
1 tsp almond extract
1/2 tsp salt
2 tbs butter
I preheated the oven to 425 degrees Fahrenheit.
I like to use fresh cherries rather than canned. For this particular pie, I had picked the cherries earlier in the day. I measured out the right amount of fruit, washed it and plucked off any stems. Tart cherries are a lot softer than sweet cherries and all I had to do to remove the seeds was to squeeze them with my fingers. When the cherries were pitted, I mixed in all of the other ingredients except the butter.

I poured the cherries into the pie pan with the rolled out crust, dotted the top with the butter. Then I rolled out to 2nd portion of crust and sealed the pie. I then cut slits in the top to ventilate and placed the pie in the oven for 15 minutes. After that, I turned the heat down to 350 degrees and baked the pie for an additional 35 to 45 minutes, or until the crust was brown on top.
The pie has to sit for about an hour for the juices to thicken and the filling to cool. Sometimes, my housemates and I are too impatient for that. I like to serve the pie with vanilla ice cream to counteract some of the tartness.
Strawberries
Ok, this post is a little long in coming. I love the end of spring because it marks the start of strawberry season. It's an event that I look forward to all winter and one that I fervently celebrate when it arrives. To me, it also marks the beginning of fruit picking season.
Granted, with the cost of fuel being what it is, pick-your-own fruit is not nearly as economical as it once was. But if you gather a number of people and split the cost of gas, driving out to pick your own strawberries is still a viable option. And the quality of the fruit that you get is just incomparable to what you would find at the grocery store. My favorite part of it all is that you don't have to pay for the fruit that you pick and eat.
I like to go to Larriland Farms near Woodbine, MD. It features strawberries, tart and sweet cherries, raspberries, blueberries, blackberries, peaches, apples and any number of vegetables throughout the summer. I only managed to go strawberry picking once this summer with one of my roommates, a colleague and friend. But, boy, did we do some damage. We picked 15 pounds of strawberries which ended up costing us $30. Not bad for an afternoon's work.
What, you ask, does one do with 15 pounds of strawberries? Well, between my roommate and I, we made 2 strawberry trifles, a strawberries and cream cake, a strawberry salad, strawberry muffins, and strawberry preserves. We ate a lot of them plain and the rest we froze to make strawberry daiquiris.
Here is my recipe for a strawberry trifle:
I start with a sponge cake recipe from Nigella Lawson's How To Be A Domestic Goddess.
1 cup (2 sticks) unsalted butter, at room temperature
3/4 cup sugar
1 tsp vanilla extract
4 large eggs
1 1/3 cups self-rising cake flour*
2 tbs cornstarch
1 tsp baking powder
1/4 cup milk
I preheated the oven to 350 degrees Fahrenheit. Then I buttered and floured 2 9-inch cake pans. I sifted together the flour, cornstarch and baking powder.
Next, I creamed the butter and sugar and added the vanilla and then the eggs, one at a time. Then I folded in the flour mixture. And finally, I added the milk. I divided the batter evenly between the two pans and baked them for 25 minutes.
For the cream filling, I used another recipe from Nigella's book:
1/2 cups plus 2 tbs brandy
1 tbs vanilla extract
1 1/3 cups whole milk
1 1/3 cups heavy whipping cream
8 large eggs yolks
1/4 cup sugar
I started out by boiling the brandy with the vanilla extract for 2 minutes and then turning off the heat. Then, I warmed the milk and cream in a saucepan. Next, I mixed together the egg yolks and sugar and gradually beat in the warmed milk. I washed the saucepan and strained the milk and egg mixture back into it. I then cooked the mixture over a medium heat, whisking it until it thickened.
I thought that the sauce would thicken to a pastry cream consistency and kept cooking it until it started to separate. At which point, I had to dunk the pan into an ice-water bath and whisk the mixture until it came back together. The mixture only thickens to a sauce-like consistency. After it thickened, I took the pan off the heat and let it cool.
While I waited for the sauce to cool, I took 6 cups of strawberries, washed and hulled them and cut them into quarters. I took 1/3 of the cut strawberries and crushed them with 2 tbs of sugar and then mixed in the rest of the berries.
Then I started to assemble the trifle:
I took one of the sponge cakes and put it in the bottom of a trifle bowl. Then I spread a layer of strawberry jam and a layer of the cut strawberries on top and a layer of the sauce on top of that. Next, I layered on the other sponge cake and more jam and more berries and the rest of the sauce. I then covered and refrigerated the trifle overnight.
When I served it, it was almost a pudding consistency. I spooned it onto plates and added a dollop of whipped cream.**
 * I normally don't have self-rising cake flour on hand. Instead, I use this substitution:
7/8 cup all-purpose flour
2 tbs corn starch
1 1/2 tsp baking powder
1/2 tsp salt
** I made 2 attempts at this trifle and the recipe, I felt was an amalgum of the 2 for the best results. The different varieties of trifles one can make is only limited by imagination. I did a combination strawberries and blueberries that was also divine.
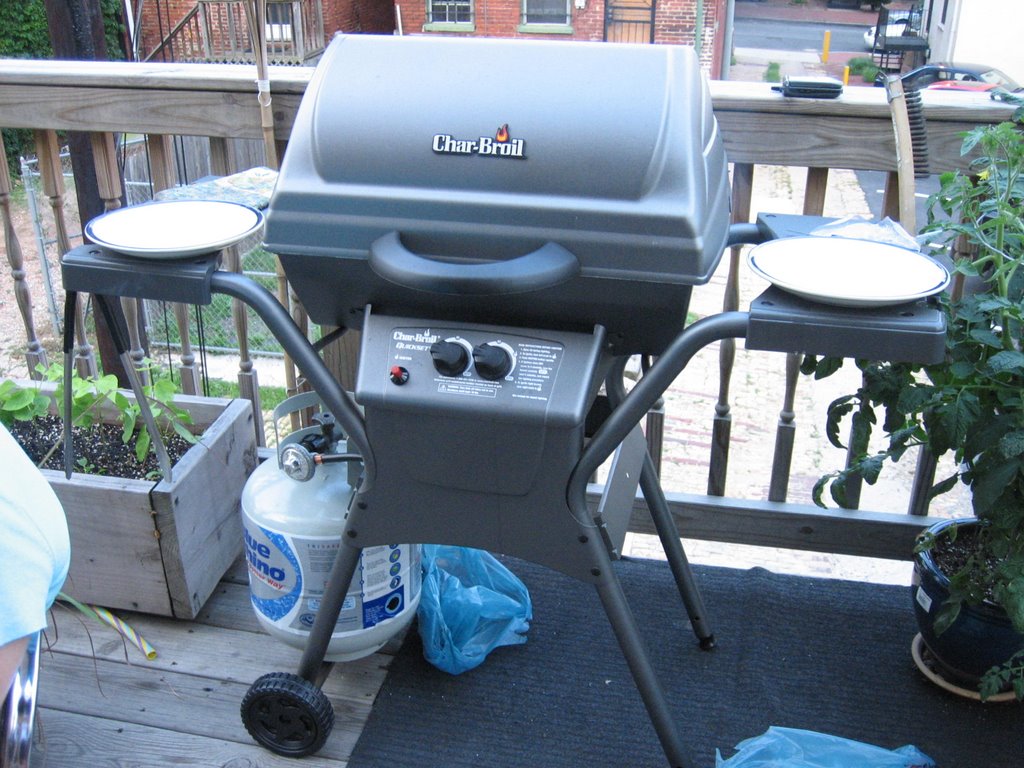
New Addition to the House
We finally did it! My housemates and I bought a large grill for our back deck. We have been making due and hosting 3 July 4th barbecues on a very small Coleman grill. A days ago, my boyfriend called and said that he had had it and was going to buy a larger grill. He's the one who's usually stuck grilling all of our hamburgers, hotdogs, veggie burgers, etc. for our barbecues and had gotten fed up with being a slave to the tiny Coleman grill.
 Our new Charbroil grill.
We wanted to make the inaugural meal cooked on the grill special, and since my boyfriend was close to a fishmarket when he called me, I suggested that we grill some fish. I thought that he would bring back salmon. I told him no tuna because of my concerns with mercury exposure. He came back with 2 very large pieces of Chilean sea bass. It was probably the most expensive fish that I've ever cooked but it was well worth the effort.
First, I rubbed the pieces with salt and pepper and olive oil. Then I cut slits along the pieces and stuffed them with slivers of garlic, sprigs of rosemary and slices of lemon. We fired up the grill and placed them, skin side down, on to cook.
Now, I've never grilled fish before and this was a pretty expensive fish to be experimenting with, so I checked out Mark Bittman's instructions on grilling fish. He said that the way to bring the fish up to 120 degrees Fahrenheit. When I got my handy thermometer out and poked into the flesh of the fish, I was surprised to find that the internal temperature was 30 degrees or so. The fish was still frozen in the center. What to do?
I turned the heat on the grill down to medium low and slow cooked the fish until the internal temperature reached 120 degrees. It took about 30 to 45 minutes. I took it slow because I did not want to overcook the fish in any way.
In the meantime, I peeled and prepared 1 pound of tiger shrimp and marinated it in a combination of olive oil, lemon juice, chopped garlic, salt, pepper and dried red pepper flakes. I threaded the shrimp on skewers and grilled the shrimp after I had taken the sea bass of the heat. I think shrimp is one of my favorites foods. It's stores so easily in the freezer and thaws quickly in a water bath. And it cooks up quickly. I cooked my skewers for 2 minutes on one side and 1 minute on the other.
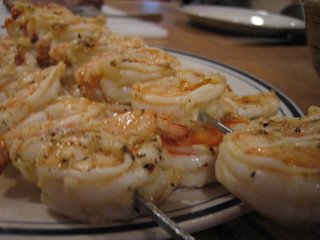
Shrimp skewers
The Chilean sea bass was wonderful. It was sweet with a subtle flavor. We ate it with rice and boiled green beans mixed with chow chow. A great way to inaugurate our new grill.